
How to A/B Test YouTube Thumbnails in YouTube Studio
· 8 min read
YouTube Studio has a built-in A/B test for titles and thumbnails, the feature many creators still call Test & compare. You upload up to three versions and YouTube shows them to different viewers. If one earns clearly more watch time, it becomes the version everyone sees. It only runs on a computer, not in the mobile app, and not on every kind of video.
This guide covers what the tool does, who can use it, how to run a test, and how to design tests you can learn from, with a worked example, a planning table and a log template you can copy. It follows YouTube's help page for the feature. YouTube changes this tool from time to time, so check that page if something looks different in Studio.
How does YouTube's thumbnail A/B test work?
- Up to three options. You can test up to three titles, up to three thumbnails, or a combination of titles and thumbnails.
- Judged on watch time. According to YouTube, the version with the highest watch time is the one shown to all viewers afterwards. It is not picked on click-through rate alone. YouTube's reasoning is that a good title and thumbnail should help viewers understand the video, so they don't waste time on one they don't want.
- Results in days to two weeks. YouTube says a test should complete within two weeks. It depends on how many impressions the video gets and how recently it was published.
Who can use A/B testing in YouTube Studio?
A test is available when:
- you are in YouTube Studio on a computer,
- you have advanced features enabled for your channel, and
- the video is a supported type.
It does not work on Shorts, scheduled livestreams, or Premieres. A Premiere becomes eligible after it ends and converts to a long-form video, and live archives are eligible. Videos made for kids, made for mature audiences, set to private, or marked as age-restricted (18+) can't be tested. If you put age-restricted content into a test without marking it that way, YouTube says you will lose access to the feature.
How do you set up a thumbnail test?
- Sign in to YouTube Studio and select the video. For a new upload, use Create then Upload videos. For an existing video, go to Content.
- In the Title box or under Thumbnail, click A/B testing.
- Choose what to test: a title, a thumbnail, or both.
- Upload or enter up to three options and click Done.
To check on a test, open the video in Studio, go to Analytics, then Reach, and look for How your A/B test is going. Click Manage test there. Do not change the video's title or thumbnail while a test is running. YouTube says that stops the test and you will need to restart it.
A worked example: testing one variable
Here is a test pair for a laptop review. The two thumbnails are the same scene. The only difference is whether there is text.
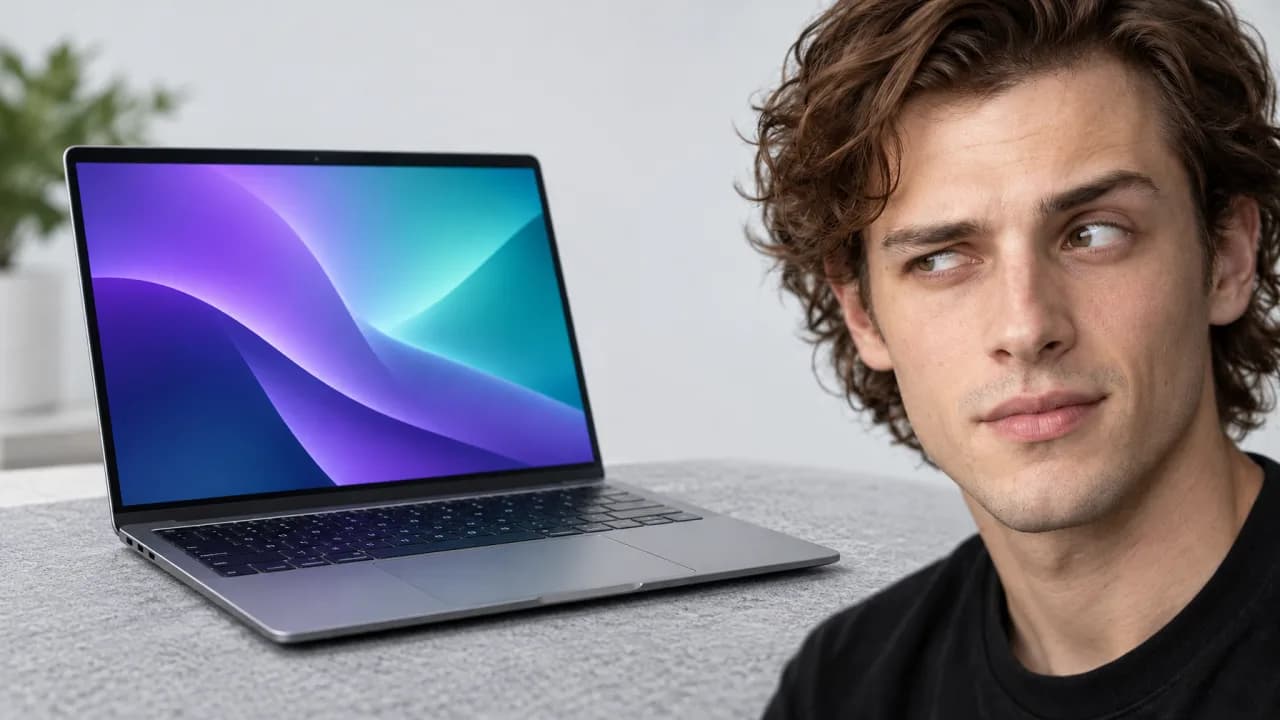 Variant A: no text. The face and the laptop carry the message.
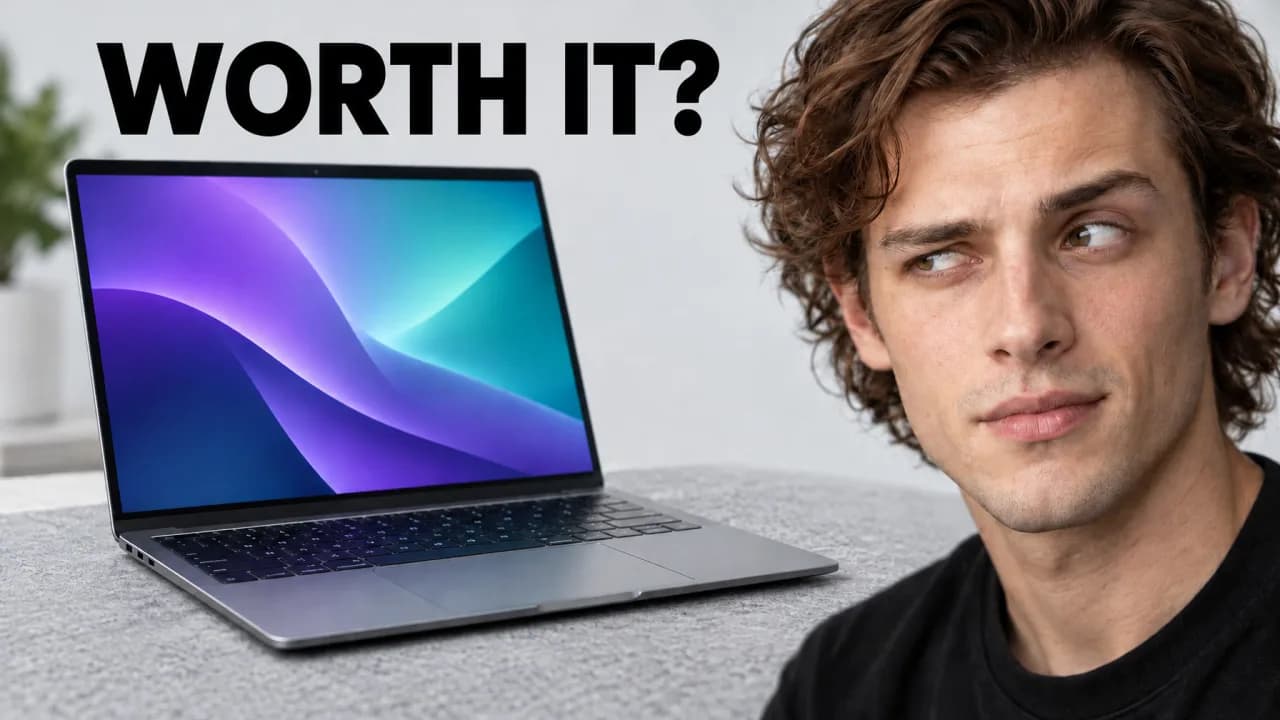 Variant B: the same scene with two words of text added.
The test question is: does two words of text help this audience, or does the face already say enough?
Because only one thing changed, the result is easy to read:
- If B wins, text helps on this kind of video.
- If A wins, the text got in the way, or it duplicated what the face already said.
- If they perform the same, text doesn't matter here. Don't spend time on it for similar videos.
Compare that with testing a red background and a happy face against a blue background and a shocked face. If one wins, you can't tell which change did it.
What to test first
These usually have the largest visual impact, so they make good first tests. The hypotheses are examples to adapt, not YouTube guidance.
| Variable | Example hypothesis | Option A | Option B |
|---|---|---|---|
| Text vs no text | The face already carries the message. | No text | Two words of text |
| Face vs object | The product is more interesting than the reaction. | Face and product | Product only, larger |
| Crop | A tighter crop reads better on a phone. | Wide shot | Close-up |
| Expression | Doubt gets more attention than a smile. | Smiling | Skeptical |
| Background | A plain background separates the subject better. | Detailed room | Solid color |
| Text wording | A question works better than a statement. | "WORTH IT?" | "IT'S WORTH IT" |
Reading the results
YouTube labels each finished test one of three ways:
| Result | What it means | What to do next |
|---|---|---|
| Winner | One option earned clearly more watch time, and YouTube keeps it. | Note what changed. Try the same change on your next two or three videos before treating it as a rule, then test a new variable. |
| Performed same | The options performed about the same, so there is no clear winner. | Pick the option you prefer; YouTube leaves the choice to you. The variable doesn't matter much for this video, so move on to a bigger lever. |
| Inconclusive | There wasn't enough of a difference to decide, and the first option you uploaded becomes the default. | Our read: the options may have been too similar, or the video had too few impressions. Make the difference bigger, or run the idea on a video with more traffic. |
"Performed same" and "inconclusive" are still results. They tell you that the change you tested doesn't matter much to your audience, which saves you from spending time on it next time.
Rules for tests you can learn from
The rest of this guide is practical advice rather than YouTube's documentation.
Change one thing at a time. One variable per test, such as text vs no text on the same scene.
Make the difference big enough to matter. YouTube's own tip is to make the options meaningfully different, because very similar versions can lead to longer tests with no clear winner. "One variable" means one idea, not a tiny tweak. Face large vs face small is a real difference. Two slightly different shades of blue is not.
Test older videos first. YouTube suggests this to limit any effect on your channel's overall views while you learn.
Use 1280 × 720 or larger. YouTube says that if any thumbnail in a test is below 720p, all of them are downscaled to 480p.
Keep everything else the same. If you build the variants in a design tool, duplicate the file and change only one layer. If you use an AI generator, expect small differences: when we made variant B by editing variant A, the model re-rendered the scene, so the laptop sits slightly lower in B. Check that nothing besides your test variable has shifted.
A testing log you can copy
A test is only useful if you remember the result. Keep one row per test:
| Date | Video | Variable | Option A | Option B | Result | What we learned |
|---|---|---|---|---|---|---|
After a handful of tests, patterns appear: maybe your audience reliably prefers close crops, or text never matters. That log is worth more than any general advice, including this article.
How we made the example pair
Both variants were made with Ctrbuddy. Variant A was generated from a prompt for a clean, text-free tech-review scene, using a saved Channel DNA style and a saved persona (a generic, stock-style face). Variant B was made by editing variant A with a reference-image edit and this instruction:
Keep the image exactly as it is: the same laptop, the same face and expression, the same background, the same framing, lighting and colors. Only change one thing: add the two words "WORTH IT?" in huge bold black sans-serif across the empty upper-left area of the wall above the laptop, perfectly legible and not overlapping the laptop or the face. Do not change anything else.
Each image is the first result for its prompt. The laptop is fictional and unbranded. Editing one image into a variant is a quick way to follow the "one change at a time" rule. You still decide what to test and what the result means. For help making the thumbnails themselves, see how to make a YouTube thumbnail.
Quick checklist
- Studio on a computer, advanced features on, supported video type
- Up to three options, each meaningfully different
- One variable per test, with a written hypothesis
- Everything else identical, and at least 1280 × 720
- Don't edit the title or thumbnail while the test runs
- Log the result, including "performed same" and "inconclusive"
Frequently asked questions
Why don't I see A/B testing in YouTube Studio?
Check three things: you're on a computer, advanced features are enabled for your channel, and the video is eligible. Shorts, scheduled livestreams, private videos, and videos made for kids or marked age-restricted can't be tested. On an eligible video, the option sits in the Title box and under Thumbnail.
Does YouTube pick the winner by click-through rate?
No. YouTube picks the winner by watch time, not clicks. A thumbnail that earns more clicks but sends viewers away in the first minute can still lose. YouTube's reasoning is that a good title and thumbnail help viewers pick videos they actually want to watch.
How long does a YouTube thumbnail test take?
Anywhere from a few days to two weeks. YouTube says the length depends on how many impressions the video gets, how recently it was published, and other factors. Don't edit the title or thumbnail while it runs, because that stops the test and you'll have to start again.
Can I A/B test Shorts thumbnails?
No. YouTube's A/B testing doesn't support Shorts. You can still set a custom 9:16 thumbnail for a Short from YouTube Studio on a computer, but you can't test versions against each other. Comparing similar Shorts over time is the closest workaround, and it's far noisier than a real test.
Can I test a title and a thumbnail at the same time?
Yes. You can test up to three title-and-thumbnail combinations. The catch: when a combination wins, you can't tell whether the title or the thumbnail did the work. Test them separately when you want to learn something, and together when you just want the strongest package for one video.